


Installing a flat shower tray
Step-by-step instructions for DIY enthusiasts and craftsmen

Why a flat shower tray?
Flat shower trays are the perfect choice if you want to make your bathroom modern, comfortable and barrier-free. They score points with their elegant design, which enables flush-to-floor installation, and their ease of cleaning - whether you are looking for a barrier-free solution or simply value a stylish look, a flat shower tray offers you many advantages.
In this guide, you'll find practical tips and detailed steps for installing your shower safely and efficiently - ideal for DIY enthusiasts and professionals alike.
In this guide, you'll find practical tips and detailed steps for installing your shower safely and efficiently - ideal for DIY enthusiasts and professionals alike.

Materials and requirements
Materials:
- Flat shower tray / level-access shower base
- Drainage system: Matching siphon and waste set
- Waterproofing materials:
- Waterproofing film or liquid waterproofing
- Sealing tapes and sealing corners for transitions and wall connections
- Sealing compound (e.g. silicone or special sealing adhesive)
- Substructure:
- Mounting feet or supports for the shower tray
- Installation foam or support material (if required)
- Sound insulation material:
- Insulation tape or sound insulation mat (depending on building regulations).
Tools:
- Spirit level
- Tape Measure
- Spanner
- Drill
- Silicone gun
Requirements:
- Sufficient installation height for the drain
- Floor condition: Stable, level and free of moisture
- Sealing the floor and walls

General step-by-step instructions
1. preparation of the floor
- Expose the subfloor: Remove the old floor covering and prepare the subfloor.
- Check height: Check that the subfloor is level. If it is uneven, a levelling compound must be used.
- Test: Check the subfloor with a spirit level

2. installation of the waste system
- Check the gradient: Ensure that the waste runs with a gradient of approx. 2-3 % in the direction of the waste water pipe.
- Mark the drain position: Mark the exact location for the drain.
- Install the waste system: Install the body of the waste in the intended location.
- Leak test: Carry out an initial leak test of the waste and check the gradient.
3. sealing the shower tray
- Apply liquid sealant or film: Carefully seal the entire shower area. Pay particular attention to wall connections and corners.
- Apply sealing tape: Apply sealing tape to all transitions and surfaces that are exposed to water.
- Allow to dry: Allow the sealant to dry completely in accordance with the manufacturer's instructions.
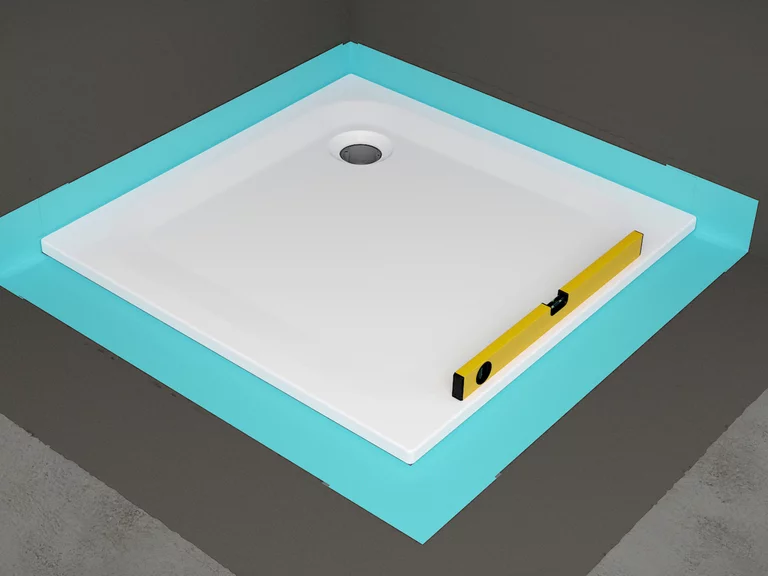
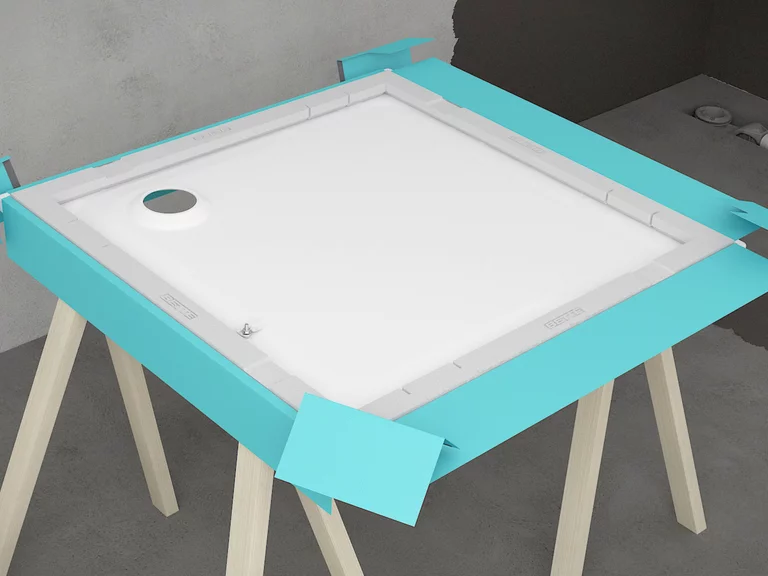
4. installation of the shower tray
- Attach the tray support: Place mounting feet, a support plate or support elements.
- Insert the shower tray: Insert the floor-level shower tray into the structure.
- Adjust the height: Use a spirit level to ensure that the tray is installed horizontally.
We recommend the following solutions for installation:


5. connect sequence
- Connect the siphon: Connect the shower tray to the drainage system.
- Leak test: Run water and check whether the waste system is tight.

6. seal the edges
- Apply sufficient load to the shower tray and apply silicone along the edges.
- Smooth cleanly with a joint smoother.
- Observe the curing time.
Flat shower trays offer many advantages - from modern design to accessibility. However, it is not always possible to install them. The structural conditions such as floor depth, slope and existing connections are crucial. If you check these requirements and plan accordingly, you can successfully implement the flat shower as a stylish and practical solution in the bathroom.